A garage door opener adds comfort and convenience to your daily routine, but only if it’s set up the right way. If you’re just getting started, the process might seem a bit overwhelming. This beginner’s guide is here to make things simple.
We’ll cover the complete process of attaching the garage door opener to the door systems correctly. You’ll learn how to align the opener arm, fasten brackets, and use the proper tools to avoid mistakes. Everything is explained step-by-step so you can feel confident as you go.
With the proper setup, your garage door will open smoothly, operate safely, and perform reliably every day. Take your time with the garage door installation, follow each step closely, and enjoy peace of mind knowing the job was done correctly and securely.
Why Proper Garage Door Installation Matters
A garage door opener is a crucial component of your home’s security and convenience. If installed incorrectly, it can lead to:
- Uneven door movement
- Excessive wear on the motor
- Safety hazards for people and pets
By attaching the garage door opener to the door the right way, you prevent these issues and ensure years of trouble-free use.
Tools and Parts Needed for Garage Opener Door Attachment
Before starting, gather these essential tools:

Having everything ready before you begin will make the process smoother.
Step-by-Step Instructions to Set Up Your Garage Door Opener
Installing a garage door opener may seem tricky, but with the proper steps and tools, you can complete the project safely.
This guide breaks it down into simple two-paragraph steps to help you finish with confidence and avoid common issues.
Step 1: Prepare the Garage Door
Before you begin, make sure your garage door is balanced. Lift it halfway by hand. If it stays in place, the springs are working well. If it moves up or down, the springs need to be fixed before installing anything.
Don’t continue if the door isn’t balanced. Call a garage door repair expert to adjust the springs. This step is important for safety and helps your new opener work the right way without unnecessary stress or damage.
Step 2: Assemble the Rail System
Garage door openers usually come with a rail to guide the trolley. Lay all the parts on the floor and follow the steps in the manual. Make sure every piece fits and is placed in the correct order before tightening.
Use the provided bolts to secure the rail tightly. A solid rail setup keeps everything steady when the door moves. Loose rails can lead to shaking, loud noises, or damage later on, so double-check each connection before moving forward.
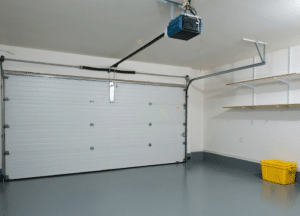
Step 3: Mount the Motor Unit
Place the motor unit on the ceiling near the middle of the garage. Use a ladder to reach the top and mark the bracket spots. Drill holes and attach the motor securely using the correct bolts for a tight and stable hold.
Make sure the motor is straight and not tilted. A level motor helps everything run smoothly and avoids problems down the line. Taking your time with this step helps your garage door system function better and last longer.
Step 4: Attach the Rail to the Door
Connect the rail to the top of the garage door using the bracket provided in the kit. Make sure the rail is level and lined up right so the trolley can move easily and without bumps during use.
Tighten the bolts fully so the rail doesn’t shift over time. If the rail is not straight or firm, the door may move unevenly or wear out faster. A secure rail keeps everything running smoothly every time you use the opener.
Step 5: Install the Trolley and Chain or Belt
Slide the trolley onto the rail. This part helps pull the door open and closed. Attach the chain or belt, depending on the model you have. Follow the instructions to make sure everything connects properly before adjusting the tension.
The chain or belt should not be too tight or too loose. If it’s too loose, the door won’t move well. If it’s too tight, it can wear out the motor. Correct tension helps your door move quietly and safely.
Step 6: Connect the Safety Sensors
Place the safety sensors on each side of the garage door, about 6 inches above the ground. These sensors stop the door from closing if something is in the way, like a child, pet, or object that could get hurt.
Make sure both sensors face each other, and the light shows they are connected. Secure the wires neatly along the wall. If the light blinks or turns off, adjust the sensors until the beam lines up and works correctly.
Step 7: Wire the Control Panel and Remote
Connect the control panel to the motor by following the manual. Mount the panel on the wall where you can easily reach it. This allows you to open and close the garage door from inside your garage with just one button.
After wiring, test the remote and keypad. They should send a signal to the opener without delay. A working panel and remote make using your garage door simple and more convenient for your daily routine and family use.
Step 8: Adjust the Travel Limits and Force Settings
Set how far the door should open and close using the travel limits on the motor. These controls help stop the door at the right points and prevent it from opening too far or not closing all the way.
Adjust the force settings so the door stops and reverses if it hits something. This protects people, pets, and items from the way. Make small changes as needed to get the safest and smoothest operation from your garage door opener.
Step 9: Test the Door Operation
Open and close the door a few times to see how it works. It should move smoothly without shaking or making loud sounds. Watch the motion and listen carefully for anything that doesn’t seem right.
Place an object like a box under the door to check the safety system. The door should stop and reverse if it doesn’t; adjust the sensors or force settings. A complete test helps make sure your new opener works safely every time.
Garage Door Installation Mistakes to Avoid
Avoiding common garage door mistakes helps keep your system safe, lasting longer, and working smoothly every time you open or close it.
1. Skipping Balance Test
If your garage door isn’t balanced, it puts additional stress on the opener. This can wear it out or break it over time. Test the balance often by disconnecting the opener and checking if the door stays halfway open.
2. Loose Hardware
Garage door movement can loosen nuts, bolts, and brackets over time. If they stay loose, the door may shake or work poorly. Tighten all parts regularly to keep the system safe, secure, and working smoothly without loud noises.
3. Ignoring Sensors
Garage door sensors stop the door if something is in the way. If sensors are dirty or not aligned, the door won’t close properly. Clean the lenses and make sure both sensors face each other for proper door operation.
Garage Door Maintenance Tips to Make It Last Longer
Keep your garage door in top shape with these simple maintenance tips to improve safety, performance, and long-term durability.
1. Lubricate Moving Parts
Use a silicone-based spray to oil the springs, rollers, and hinges every six months. This helps reduce noise, prevents rust, and keeps the garage door running smoothly without wearing out the parts too quickly.
2. Tighten Bolts & Check Rails
Look for any loose bolts, nuts, or brackets and tighten them carefully. Also, inspect the rails to make sure they’re straight. Loose or misaligned parts can cause loud sounds and affect how the garage door opens and closes.
3. Test Auto-Reverse Feature
Place a small item like a piece of wood under the door and press the close button. The door should stop and reverse immediately. This safety feature is important to keep pets, kids, or objects from being harmed.
Conclusion
Make sure your garage door opener works smoothly from the start. A poor setup can lead to noise, safety problems, or early wear. Avoid frustration by choosing experts who understand the entire process and follow proven installation methods.
Harrison Door Company delivers reliable solutions for homeowners who want lasting results. Our team ensures proper alignment, secure mounting, and flawless function. From tools to final checks, we handle each step with care so you don’t have to worry.
Contact us today and enjoy peace of mind. Call (575) 749-9454 now for professional help with attaching a garage door opener to door systems. We’ll make sure your garage operates safely, efficiently, and without hassle.
Frequently Asked Questions
How to attach a garage door opener to a door?
To attach a garage door opener to a door, first install the opener rail and motor to the ceiling. Then connect the curved arm to the door bracket using the straight door arm, securing it with bolts for a firm, aligned connection.
Where Should You Keep Your Garage Door Opener?
Keep your garage door opener in a safe, hidden place inside your home or car to prevent theft. Avoid leaving it in plain view, like on the dashboard. A secure location helps protect your home from unauthorized garage door access.
How do I secure my garage door opener?
Secure your garage door opener by using a strong access code, enabling rolling code technology, and adding a smart opener with alerts. Also, disable the emergency release when away for long periods and ensure Wi-Fi and keypad connections are encrypted.
How do you reattach a garage door to the opener?
To reattach a garage door to the opener, pull the emergency release cord down and toward the opener. Then, manually lift the door until the trolley catches back onto the opener arm. Run the opener to ensure the door moves correctly again.
How does the garage door connect to the opener?
The garage door connects to the opener through an arm attached to the opener trolley. This arm bolts directly to a bracket on the door, allowing the motorized trolley to lift and lower the door along the tracks when activated.
End Note
If you need help attaching a garage door opener to door systems, visit Harrison Door Company for trusted and simple garage door services. We handle installation and replacement with care, making sure your garage door works safely and smoothly every day.
Our team provides top-quality garage door replacements that fit your opener setup and home style. Every job is done right for strong, lasting results. See our recent projects and updates by visiting our Facebook page.
Schedule your service through the contact page and enjoy a smooth installation and opener attachment. We make it easy to upgrade your garage with strong parts, expert work, and reliable results that last.
Harrison Door Company
117 W 2nd St, Portales, NM 88130, United States
+15757499454